The Tank
Ok lets get started.
I found a group and this was the tank chosen:
Unfortunately I couldn't download Autodesk ReCap because its only offered for PC operating systems and I have a Mac.I then checked the university computers- they have ReCap, but not Recap Photo. So I was left relying on someone in my group to download the right software.
Enter Charlie (absolute champion). He went about taking a bit over 100 photos of the tank, uploading to the cloud that is Recap, which resulted in a 3D model that was then taken into Slicer for Fusion 360, which divides the model into laser cutting sheets for you.
After fiddling in Slicer to get the number of sheets correct, and doing test sheets in class to make sure the slot size was big enough so all the pieces would fit together, we were ready to laser cut.
 |
| In class 2/5/18, experimenting with slot size on the laser machine |
So I quickly changed all the line weights (stroke 0.001, no fill) and colours (RGB mode, pure red for cutting lines), as well as orienting all 13 pages to landscape and we were good to go.
I found recording an action in Illustrator really good for this; it made the process more efficient because you can just apply the same set of actions to each document by pressing play in the Action dialogue box.
There was no one on the laser cutter next to us so we were kindly able to use two at once, which made cutting our 13 sheets alot faster.
After opening file in Illustrator you check its all correct and then go File-Print.
You then go into the laser cutting software and drag your file into the central screen space so you can preview your sheet. You must press the eye icon to view your work, and move the laser to the top-left of your sheet, and then align your sheet to the laser by clicking and dragging onscreen.


You must also turn on and auto-focus the laser before you begin.
You are required to choose your materials (in this instance we used 3mm plywood) and press the update button.
Following this you select your linework, right click, and then do an action which i have forgotten already...


Charlie and Monica assembled the model.


 |
| In class 9/5/18 |
On Daniel's teacher advice it was decided to divide the tank into 6 different sections. This would be the easiest way of achieving accuracy with the form of the model.


Next came making the paper templates. Using a texta and A3 paper we shaped the paper around the tank and used a texta to trace along the ridges of the tank where we had decided to split it into sections.


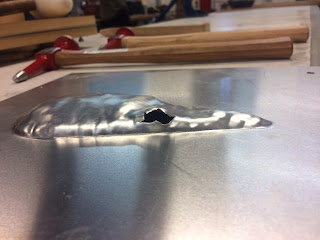
After cutting the templates out with scissors we traced this onto our pieces of metal. I was responsible for doing the two reverse curves that dip on either side of the centre piece which overlaps the fuel opening at the top of the tank.
 |
| Cutting one of my pieces out |
 |
| Russell (right) getting me started |
 |
| Using the small English wheel to flatten out some dints |
 |
| My group at work |
 |
| Testing my pieces against the model |
 |
| With my groups pieces |
 |
| Polishing |
 |
In process   |
 |
| Polished and finished. |
Comments
Post a Comment